Search This Blog

Friday, August 15, 2014

Pearls!.....we love our pearl jewelry! Let's go make some!!

In your yard sale adventures this week-end, keep your eyes on the look-out for pearls. Vintage pearls or Mardi Gras pearls, even if they're knotted on their string, we can make something a little more modern to wear. You'll need these "ingredients":

For the first necklace:
1.) a string of pearls; loose or knotted or Mardi Gras pearls (Michael's has a string of pearls for $1 )
2.) some satin ribbon- $1 a spool at Dollar Tree
3.) needle and strong thread, like quilting or buttonhole thread, to match the ribbon
4.) an old earring or fancy button to glue onto your necklace
5.) strong glue; or hot glue gun and sticks


Here's a black satin and pearl necklace I made a little while back, very cute! Find some directions here at The Examined Life


This is one I made a while back, I love the black and white together, the bow, the rhinestones-and wearing it with jeans! When your necklace is all finished, tie a bow around one end to hide anything that might not be too neat  (!!!what!!!-yeah, I'm a mess lately!) Sew or glue, a button, or old earring to the other end. What would we do without hot glue guns??  I wish I knew where I put my glue sticks, both sizes; I really need them!


This one is really easy to make...I used a strand of brown/copper colored glass pearls, and an elastic hair tie. Cut the hair tie in the center, and with your needle and thread begin by sewing it to one end of your hair tie, then stringing your pearls ( you may not use the whole strand. It will depend on how long you want it to be ) when it's as long as you like it, sew the other end of your hair tie to it. I finished up by gluing some grosgrain that matched to cover the elastic. If I'd thought this through first, I would've used beads or something else besides the grosgrain; I'm definitely not liking it anymore!  lol )


 Here are some of your "ingredients"....earrings not shown, sorry guys!


 This is a silvery-gray piece of satin that I cut a strip out of to make this twisted rose. There are too many tutorials out there to make another one  *wink 
use an old earring, or one of the pretty rhinestone beads from Michael's or Hobby Lobby (don't forget to use your 40% or 50% off coupons!)


 I sewed this one on, and covered the back with a piece of the satin. I also sewed on the rose, and cut out a circle to cover the back. You could use felt or fleece, that would be soft against your skin.


 Do you have some pearl Mardi Gras beads? or a piece of old Dress-Up jewelry from your daughter or granddaughter?  I cut a length of the pearls to fit my wrist.


 I used the larger beads for a bracelet using 2 pieces of fabric I tore off of a fat-quarter I bought at Walmart. You can use an old shirt or something like it. I'm not sure how big they are-22" maybe? I used two of them. Use ribbon if you like, using the same method.


 Tie one to the other, about 8" down; tie in a knot. Now you have two strips of fabric. Braid all three together beginning at your knot. Tie another knot at the end Get your trusty hot glue gun out and glue those knots to the first and last pearls.


 Mine isn't very neat! Doesn't really matter, because you will be tying the bracelet on your wrist by tying it into a bow.


 These are smaller Mardi Gras beads. Cut a length to fit your wrist, and cut a length of ribbon about 30" or so.


I tied the ribbon to the pearls about 8" down, and began a blanket stitch type of braiding on this one. If you ever were in the Brownies or Girl Scouts, or camp-you'll remember how to make it. I couldn't get very good photos of this, maybe the ribbon is too light. It's a pale, sheer green to match a dress.


 Tie a knot at the end Now go back and hot glue the knots to your first and last beads. I left longer ends on this one so I could wear it as a bracelet or a necklace.


I have a feeling this is going to be confusing,lol, but I hope not!

Next time-leather scraps-start looking for old belts, purses, boots, lacing....and we'll make something pretty  <3 br="">


 Go make something!
Kudzu


Thursday, July 24, 2014

Making Paper Beads-Recycle The Sunday Funnies, Magazines, Gift Wrap

 Making paper beads relaxes me. I have a lot of beads, but there's always room for more! I googled "paper beads" and found templates to print out on your scrap paper. There's plenty of shapes, but I mostly use just one. Check out these images and templates . Today I'm going to cut out some cone shaped ones, and button shaped ones.

*Here's A Great YouTube Video*

 You'll need some "Ingredients":
 old magazine pages
 scrapbooking paper
 tissue paper
 gift wrap
 glue-I used school glue
 wooden skewers  (the kind you would use for shish-kabobs, you get about 100 for $1) cut into about  4" lengths (I even read where some Girl Scouts used coffee stirrers)
 toothpicks or a length of craft wire
 clear gloss spray (or clear nail polish-it's what I prefer) or varnish
 elastic beading string or whatever you want to string your beads on (about $3)
 a piece of foil or wax paper
               * You might make your necklace long enough to just slip over your head *
 memory wire for bracelets (about $3-will make at least 3 bracelets)
 some beads to fill in your necklace with, if you want ( I found a pretty good sized package of painted wood beads at Dollar Tree)

 The best part of going to Ocean Springs is driving off over the Gulf in Biloxi!
                                     

   I'm going to use the front and back cover of this magazine.

 
 Ingredients!


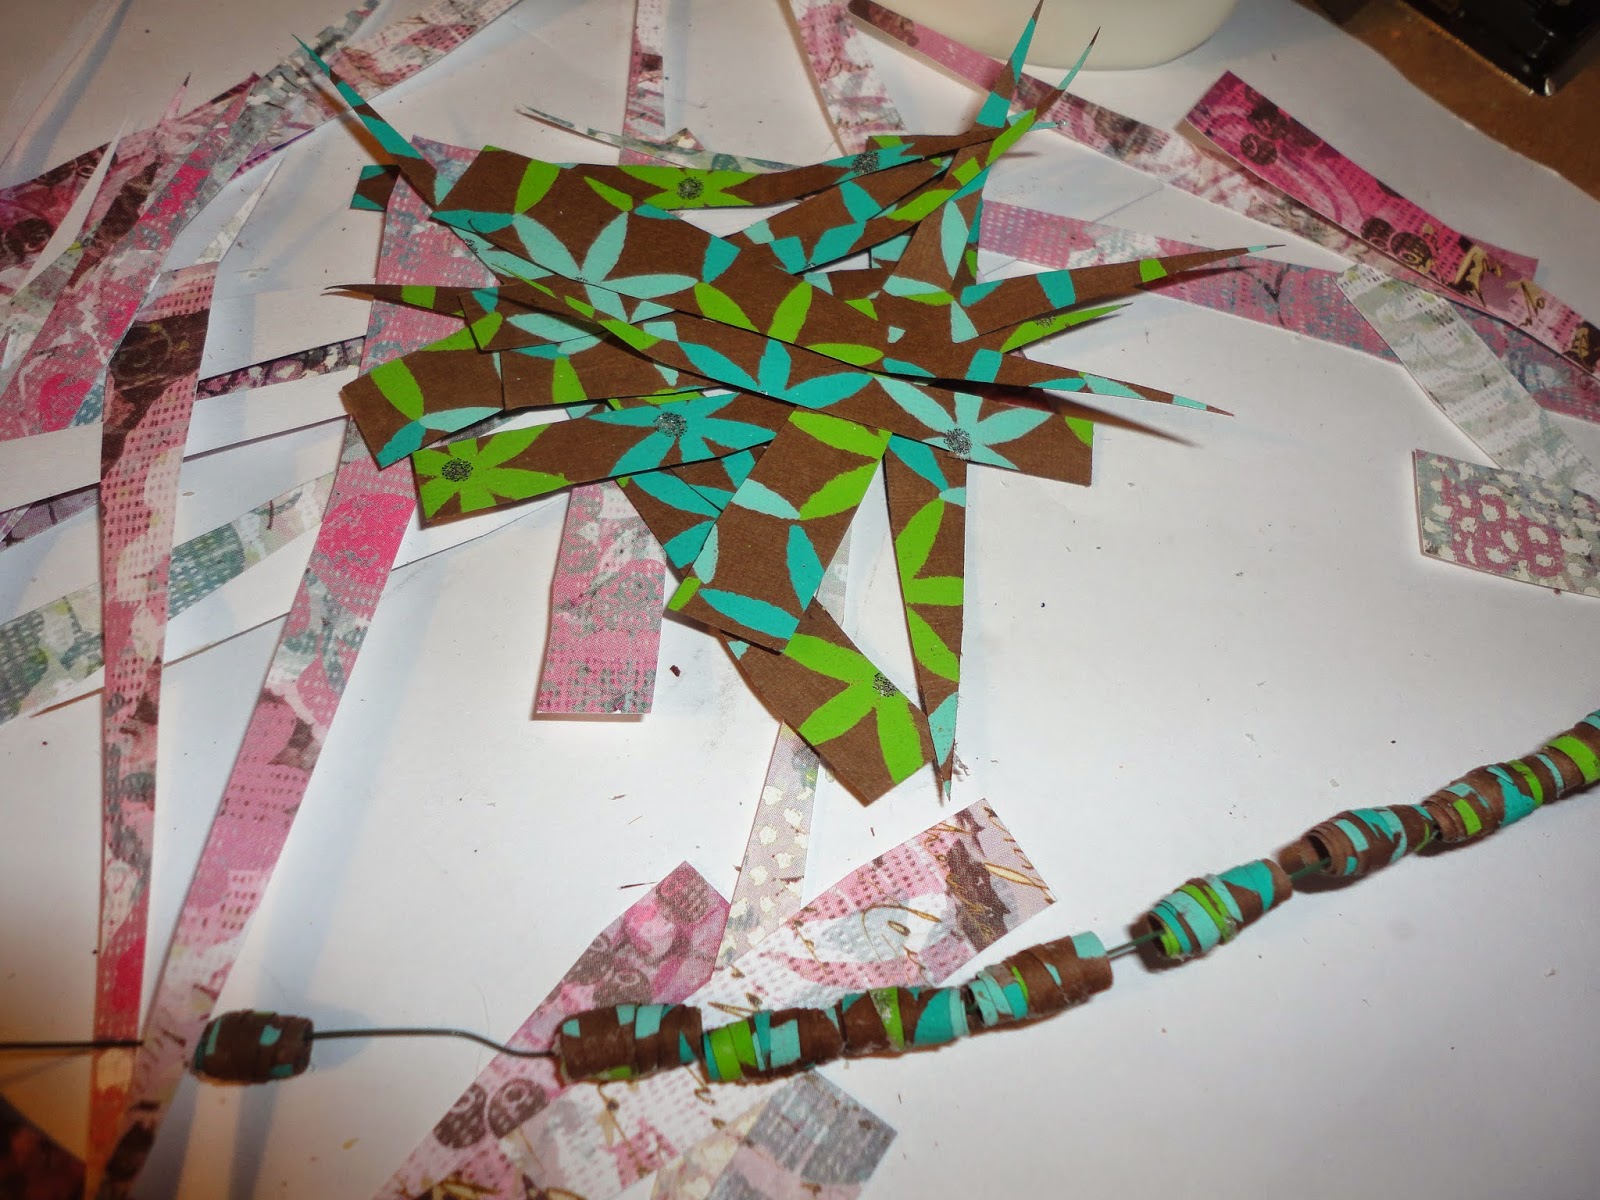
  And cut some strips like this. Choose the pattern you like for your bead shape, and print out using one of the templates you like. I've mostly cut mine freehand, or marked my pattern out myself with a ruler.  Once you have a nice stack of them, get your piece of skewer and wrap the large edge around your skewer a couple times; dab some glue on the rest of your paper and roll it up. Don't roll it so tight that you can't slip it off your stick, lol! (ask me how I know!)


   Roll the strip on your skewer once or twice, then add a little glue. Continue rolling your paper strip and adding a little glue til you reach the end. I like to take my bead off the skewer and let it finish drying on foil or waxed paper.


Make sure the end is glued down, they seem to want to pop up...


This is what the wire is for, lol! Once I make my beads, then I string them on some craft wire. When the glue dries, take them outside and spray your clear spray or varnish on them. I like clear nail polish, at least 2 coats of whatever you decide to use.

Red beads are pretty.....


But I'm going with the crackled turquoise beads, and some silver beads, too. And I made a pair of earrings too. Somewhere in outer space is a photo of a matching bracelet!  I have no idea how I did that!


  You can also make a bracelet with the elastic string or memory wire; and even a pair of earrings to match. If you make earrings, you'll need eye pins, and earring wires.


 One more thing-I made some cone-shaped beads-


And made an angel. Cute!


Now go make something!
Kudzu


Below are some more examples of paper beads I made-


Aiden and Zach camping out on the living room floor-Dug keeping guard!


Saturday, July 12, 2014

I Finally Got Caught Up In The Chan Luu-Inspired Craze


Well, I'm back with a tutorial for a beaded bracelet-it looks hard to make, but it's easy, I promise!

Supply List:
a package of beads, or beads from a broken necklace
leather cord
large-eye needle that will fit through the hole in the bead when it's threaded
embroidery floss, or perle cotton
nail polish
shank button
scissors


I made an 8" bracelet using about 26" of leather cord. Thread the leather cord through the shank of your button; push it til it's in the center of the cord. Cut a length of floss about 10" longer than the leather cord. Use the nail polish to stiffen the end of your thread, pinch it between your fingers to flatten it before it dries. This is to help make it easier to thread the needle. Knot the end of the thread and put a dab of nail polish on the knot, to help keep the knot from unraveling. Okay-now working with the single thread, start a figure 8 by sewing back and forth right on the leather cord under the shank of your button;


dab nail polish on that, too. Now you're ready to start beading. Pick up a bead and push it to the end of your thread; hold it down with your thumb; coming up between your 2 leather cords, go over one side, then under the opposite side, making sure you go through the hole in the bead again.


 Keep stringing the beads on til it's the right length for you, somewhere between 6" and 8" or so.


When it's long enough, make a figure 8 at the end of the beads to secure them.


Cut off the excess, tie a knot, and dab some nail polish on the knot. Now tie a knot in the leather cord at the end of the beads; then tie another knot, this will be your closure. Make sure the button fits through between those 2 knots.


All done!  Send me pics of yours!


Go Make Something!
Kudzu


Friday, March 21, 2014

Making Faux Mercury Glass

I know I've been gone a couple years or so, but I'm back, and I found an easy tutorial to make the popular faux mercury glass. Isn't that pretty? Just like the antique glass.
                                               

                                                This is a close-up of mine-it takes a little over an hour to make, and that's drying time. I set a Mason jar inside the vase, because I'm not sure if the paint will flake off or not.

Now, let's make one, you'll need to gather these supplies:
1.) the glass you want to spray(it will be sprayed on the inside of the glass, that's why I chose this wide-mouth vase from Walmart for about $4 bucks (only because the local thrift store has been charging that much for their donated ones)
2.) Krylon Looking Glass Spray Paint (it HAS to be this brand-it's the only kind that I know of)  it's about $12 at Walmart; there are more projects to make with this glass, and you may even want to make a whole set of votives or something :)
3.) a spray bottle
4.) vinegar (I used white vinegar)
5.) water
6.) paper towels

Put a 50/50 solution of vinegar and water in the spray bottle. I used 1/2 cup vinegar, and 1/2 cup water mixed up in the spray bottle. Now, find the setting on the spray bottle that makes the finest, barest amount of the vinegar/water solution. Spray a few times to make sure. Now spray into the vase, just a light mist, just a few times. If it runs, pat the spot a little with your paper towel. Some runs will make it look authentic, though.
                                          Step 1.) the glass you want to paint.

 Now-spray the http://www.krylon.com/products/looking-glass-mirror-like-paint/ in the vase; it's a very runny paint that dries very fast. Dab at some spots inside your vase til it is to your liking-we're going to make 3-5 coats. Or as many as you like! Wait about 15 seconds. Now mist a little vinegar solution in the vase and pat it down; you can rub a little harder on some spots than others, as long as you're going to add another coat.
                                         

                                          Step 2.) You can see the fine mist of vinegar/water solution on the first coat of paint. Dab runs and various spots til it's the way you like it.

                                         This is what it'll look like after you dab away some vinegar solution on your second coat of paint.

                                         
                                              3.) Step 3.) This is another coat of vinegar solution and another coat of http://www.krylon.com/products/looking-glass-mirror-like-paint/.....almost there!


                                                       Here's another close-up.


 Keep going til you're satisfied with the way your vase looks-and that's it! Let it dry about an hour and then you can put it on the table with flowers in it-and enjoy it!  I used a mason jar set inside my vase since I don't know how the paint would react to water. I'll experiment another day and find out!   Enjoy!

Here are some links I checked out before I made my vase.
Anna   http://www.takethesidestreet.com/
Ruth    http://www.livingwellspendingless.com/2013/04/23/how-to-make-mercury-glass-diy/
  Thank You Anna and Ruth!!


Now-
Go make something!!
Kudzu